Migrating a website to WordPress is usually seen as a complicated task. Many people struggle to do the job as they do not know how to manually migrate WordPress site. If you are one of them, you will get an easy guide reading this article. We have tried the method ourselves and got perfect result. Using the method will make your task effortless.
Let’s see how to manually migrate WordPress site
For manually WordPress migration, you need to follow the steps given below:
- Export files.
- Export the database.
- Create a domain in the new hosting
- Create a database on your new hosting
- Export the database
- Upload your website files
- Configure WP-Config.php.
Export Files
The first step of the process of how to manually migrate WordPress site is exporting the files from our website. In the case of using CPanel, we can use the CPanel File Manager.
The export is quite simple, we must go to the CPanel File Manager.
After entering the file manager we must go to the / public_html / folder located on the left side.
The next step is quite important since we will have to choose the folder where the web files that we want to migrate are located.
If you have several installations, it will appear as in the previous screenshot, in which you will have a folder for each website that you have hosted on your CPanel.
In the event that you only have one installation, when you access / public_html /, all the files will appear without having to select the corresponding folder.
- We select all the files.
- Right click> compress all files in .zip format.
In the next task of how to manually migrate WordPress site, we download the compressed file (.zip)
Export Database
Continuing with the example, within CPanel we must export the database, although for this we must first know the name of the database that we have to download.
Note: If you only have one installation you will have no problem since you should only have one database.
To know the name of the WordPress database to migrate, we will go to the WP-Config.php file> right click> view.
A new window will open in which we can check the name of the database.
You can use Cntrl + F and search for DB_NAME.
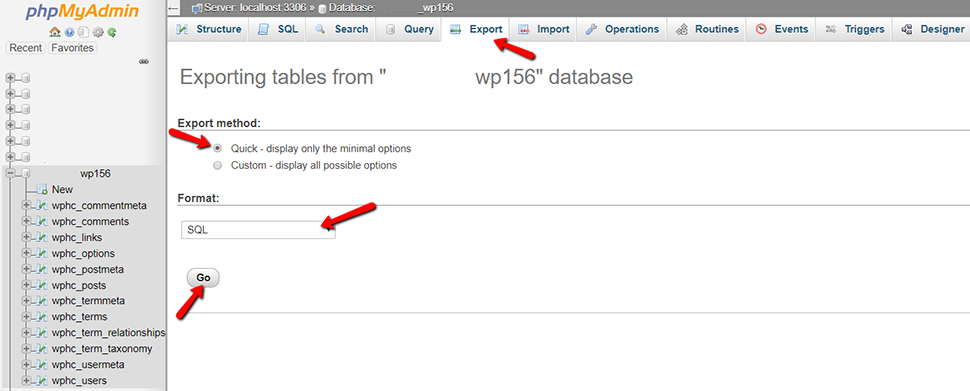
Once we know the name of the database of our WordPress to migrate we will go to PhpMyadmin in our CPanel.

Now we select the database that we have seen before thanks to the WP-Config file and export all its content.
A new window will open and we will have to press continue to export the database.
Exported the database and the files of our WordPress we will go to the administration panel of the new server where we want to migrate.
Create a Domain in the New Hosting
For this, we will go to our new CPanel> Complement domains (or additional domains)
We will have to fill in the first field with the new domain name that we are going to migrate, and the other fields are automatically filled in.
Keep in mind that when you do this step a new folder will be created in the file manager / public_html /
Create Database
Creating a database is a crucial part of how to manually migrate WordPress site. To create a database in the new hosting we will have to go back to the CPanel of the new hosting> MySQL databases.
We create a new database with the name we want.
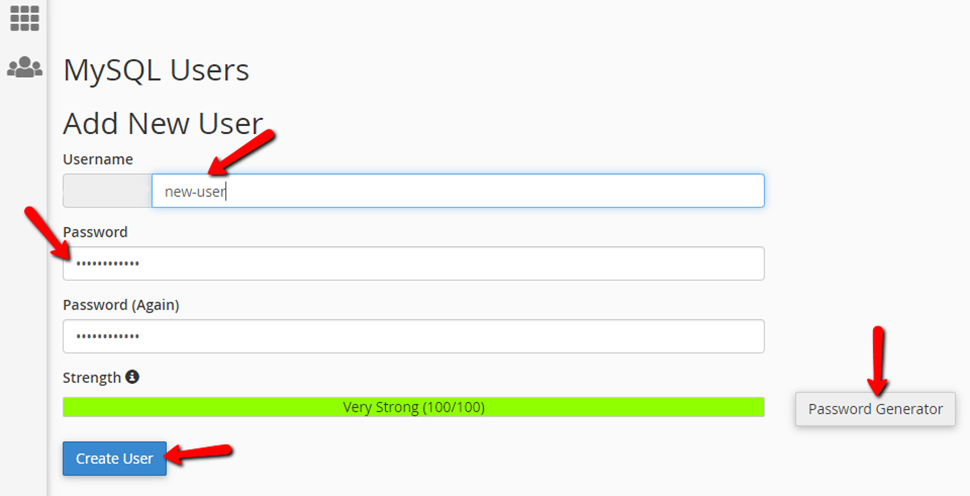
We will add a new MySQL user, for this, we will only have to scroll within the MySQL Databases screen within CPanel.
Note: As in the previous step, you will need to write down the prefix next to the name of the database, the username, and the password that you indicate in this step because you will need them later.
The next step will be to add the user that we just created to the created database.
Lastly, grant all privileges to this user for the linked database.
We have everything ready to start moving the content from one hosting to another.
How to Manually Migrate WordPress Site- Export files from the Web
To export the files to the new hosting we will have to go to the file manager of the new hosting.
We will go to the corresponding folder of the domain to migrate to the new hosting.
Once inside the folder, we will have to upload the .zip of the files that we previously downloaded in step 1 of exporting files.
Once the file is uploaded we will have to unzip it.
Export Database
Now we must upload the database that we previously downloaded from the source hosting to the new database that we have created in the new hosting.
If we use CPanel it will be in the same place as in the previous hosting, in PHPMyAdmin.
The database that we have previously created will be empty, so we will have to export the database that we exported in step 2.
Once the export button is given, the following screen will appear where we will have to upload the corresponding database.
Edit wp-config File
Once these steps are completed we will have our database uploaded together with our files, now we will have to connect the database and the files through the WP-Config file.
This is done since on the one hand we have the database and on the other the web files, so we must connect these two elements through the wp-config.php file, indicating in this file which database corresponds to it.
The operation is quite simple, we will only have to go to the file manager of the new hosting and enter the wp-config.php file by editing it.>
Located the file wp-config.php we will have to edit it to change the following fields:
- Database name: ‘DB_NAME’, ‘database name’
- User: ‘DB_USER’, ‘user’
- Password: ‘DB_PASSWORD’, ‘password’
Once the previous steps have been carried out, we would have our website migrated to the new server, now it is advisable to review the migrated website in the new hosting before changing the DNS, in this way we will make sure that the migration has been carried out correctly.
For this we will have to make a post host entry, to be able to see from our computer the status of the migrated web without having to change the DNS, for this, I leave you a tutorial on how to make an entry per host.
Check the following:
- The web looks like it was originally
- Display all pages correctly
- We have no internal 404 errors
- Orders can be placed.
If you have already checked that your website works perfectly, now it’s time to change the DNS to the new server.
You May Also Read: The Latest Widgets In The WordPress Block Editor
Most common problems After Migration in WordPress
You have read the article and understood how to manually migrate WordPress site. Now you are ready to migrate your site to WordPress. You need to consider the common mistakes people do while doing this and avoid them. Some common
Migrate with Little Time to Spare
The main mistake is almost always doing a migration with very tight times, which can cause us not to check the migration well after doing it.
This implies that we make a mistake that is difficult to correct if we are not careful.
A fairly common mistake is having migrated the web but not having changed the DNS.
If we have an entry per host on our computer, we can see the new website or migrated website, even being able to make changes to it and we can see those changes.
Solution
The problem can come for two reasons:
- We have not made the DNS change correctly so other users continue to access the old version.
- We have made the DNS change, but the DNS has not propagated yet, remember that the DNS can take up to 24 hours to take effect once changed.
Failed to Export the Database or Files
It is possible that when importing the database the new hosting will give us an error in the process. This error may be due to the new or previous hosting. This issue is faced by many people as a result, we think of adding the solution of it in the article on how to manually migrate WordPress site. We hope it will help users to get relief from the problem.
Solution
We will have to identify the origin of the problem since it may be due to the fact that the previous hosting had a parameter configuration in PHP or MySQL times that does not allow us to download all the files, so we would have to contact the hosting of origin.
Or that we have the limitation when uploading due to the same PHP or MySQL times.
In both cases, I recommend talking to the different hosts to explain the problem so that they can expand the resources and be able to carry out the migration correctly.
It may also be the case that we have permission problems when downloading the files, so we will have to adjust them.
The Web does not Register Orders
You will find different solutions on how to manually migrate WordPress site but you may not get the solution to the problem regarding orders. In the case of having a WooCommerce or online store, you must be careful when making the hosting migration, since the following situation may occur:
This is because DNS is spreading, some users will access the new server and others the old.
In this case, the best thing is always before changing the DNS to stop all the enabled advertising campaigns, but the two WordPress in maintenance and make the DNS change at the time of least activity, such as at the weekend and on schedule night.
SSL Certificate
If the website loads you without an HTTPS certificate, it is possible that you do not have the SSL certificate in that domain enabled in the new hosting, so to have your website with HTTPS we will have to activate SSL in your WordPress.
Conclusion
In the case of migration, you should not be worried anymore as you have learned how to manually migrate WordPress site from the article. If you face any problems, come back and read the article again, you should take into account the details that I mentioned above. You may need help from the technical service if you can not complete the task using our methods. Therefore, choosing a quality WordPress Hosting with technical service is vital for this process to be as smooth as possible.